CSDEV01: An introduction
An introduction to the unix compute environment at BSC
This is intended as an introduction to the use of the Linux/unix compute server at BSC.
Quick navigation
logging inWorking with files and directories
command line programs you might need to use. (changing passwords and moving into another directory)
Editing programs
Moving files to and from other computers
Logging in
In order to use the compute server you first need to connect to it. My instructions below will be on connecting to the server from on campus. All of the tools that I'm using are freely available so you can get a copy to work from home if you want to.In particular on windows you want to see xming and putty. To get xming. scroll down to the Releases section of the xming page and get the "Xming-fonts" link in the table just below that says "Public Domain Releases" Then you can use this link here for the actual xming setup. (apparently they have moved several things behind pay passwords recently.
First you need to start the xserver which will allow you to have windowed programs that you run on csdev01 display on your windows desktop. In the image below you can find the menu options to start xming. Start it, the only indication that it is running will be an additional icon in the system tray.

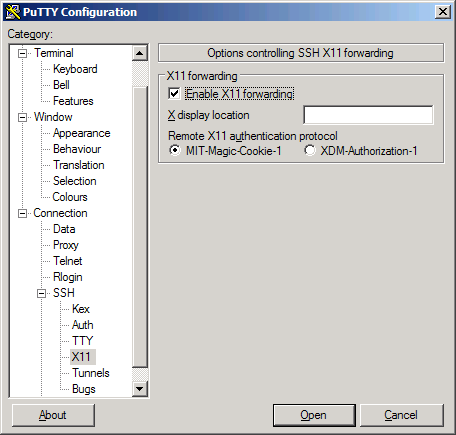
Next, from the departments->Math & Computer Science menu start putty. When you start it up there will be a configuration page visible. Down near the bottom of the tree control on the left hand side is an option for X11. Select it, and then check the checkbox labled "enable X11 forwarding" as shown in the picture below. (if you save your profile as I descrive in a moment you will only have to do this step once.)
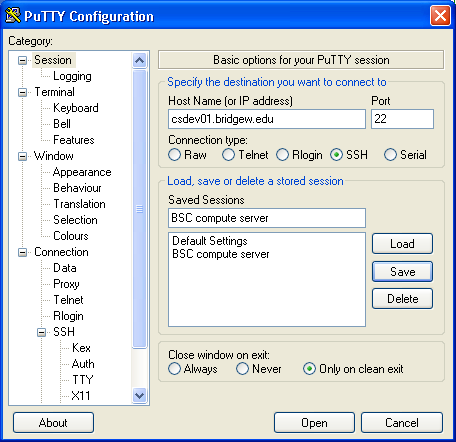
then go back to session and type in the name of the server (see the picture below). I recommend choosing a session name and pushing the save button. Once you have done this, then the next time you run putty you will only have to select your session and press open to connect with the options you have saved.
The first time you connect to csdev01 from a machine you will see a warning message like this:
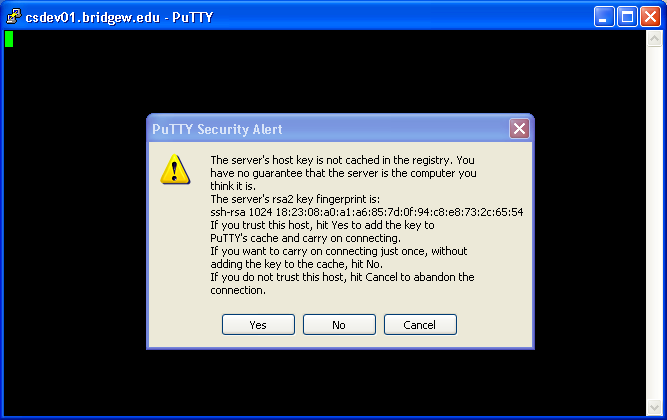
You can go ahead and select yes. Unless the machine gets reinstalled, you shoudn't have to answer this question again.
You will then be prompted to login. Use the unix ID that you were given, not your standard BSC login. Also when you enter your password, remember this is old school security, you will not see anything while you are typing the password. Your password is still being entered though.
File and directory manipulation
Once you are connected I recommend that you use konqueror to do your
file management since it has an interface similar to a windows file
explorer[jsantore@csdev01 ~]$ konqueror &
[1] 28664
[jsantore@csdev01 ~]$ Link points to "/tmp/ksocket-jsantore"
Link points to "/tmp/kde-jsantore"
kbuildsycoca running...
The & character give you your prompt back so that you can run additional programs while you are waiting. You will want to use this when starting programs which pop up a window, but not with command line programs since you will want to see any output for those programs on your command line.
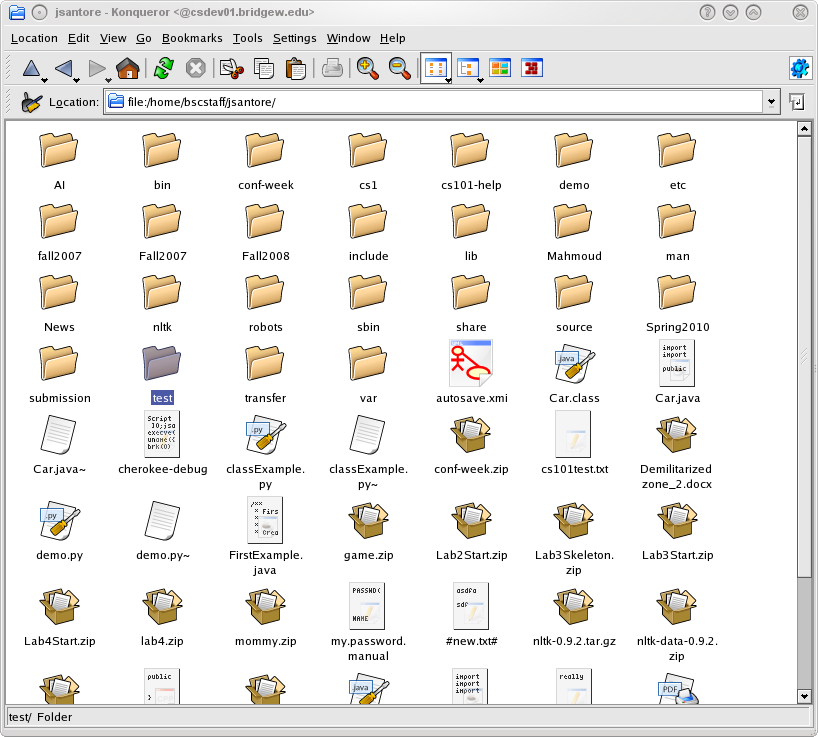
Konqueror should look something like this (except you will have far less in your home folder.
Command line
While you can do nearly everything in linux using windowed programs these days, there are a couple of places that you will probably still need to use the command line.Changing your password
the easiest way to change your password is to use the commondline program passwd.you will be prompted to enter your old password, and then twice enter you new password. In all three password entries, you will not see any indication that anything is being typed. This is again an old style security technique when security was considered more important than usability.
Moving into a folder on the command line.
After you create the folder to do your project using konqueror, you will need to move into that folder at the command line in order to compile your programs using the command line compiler. use the 'cd' command at the command line for that.Lets assume that you have a folder called Project1 in your home folder. To move into that folder, you'll need to use
cd Project1
Editing programs
For editing programs several options are available. A very simple
approach is to use xemacs to edit your programs and then use the
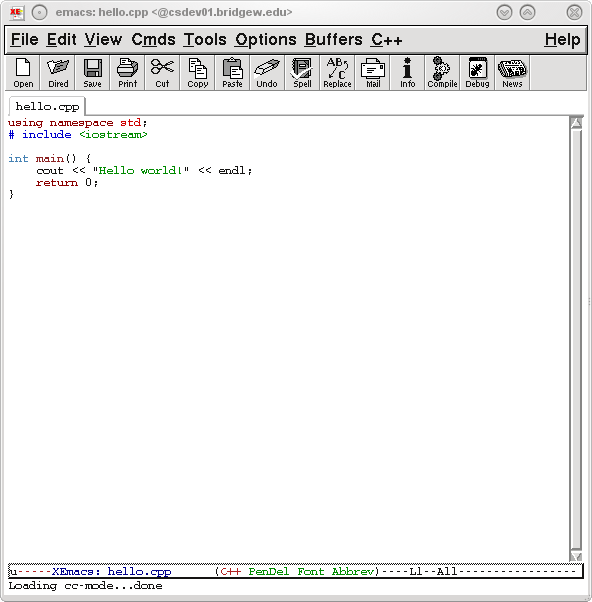
command line to compile your program. Start xemacs with xemacs &
it will look something like the image below. Note that though the image below shows c++ syntax highlighting xemacs, like most code editors will do proper syntax highlighting for all of the languages that we are using this semester.
Moving files onto and off of csdev01
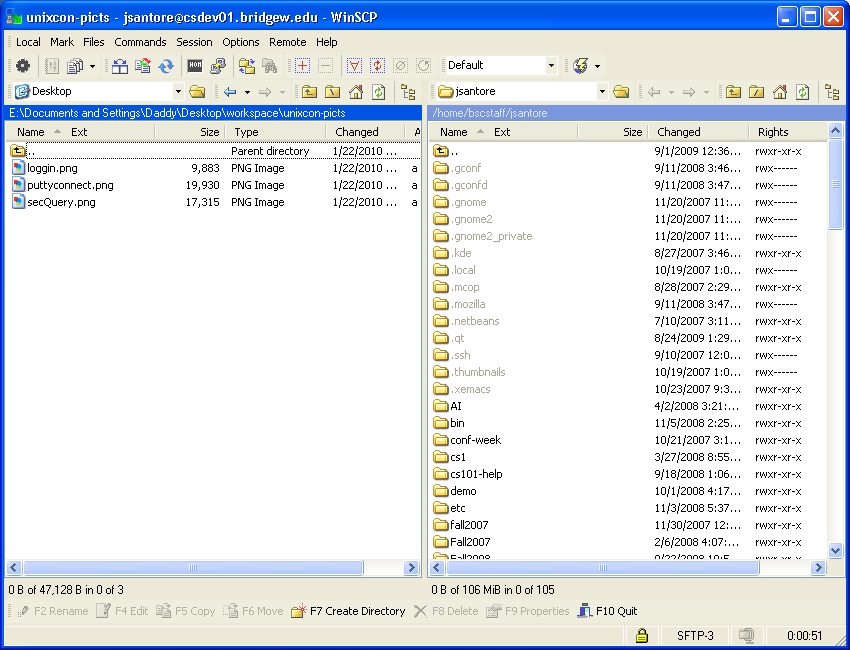
I recommend that you use winscpto move files to and from the server if you do part of your work on another machine. It will give you a nice GUI interface for moving files from one machine to the other.
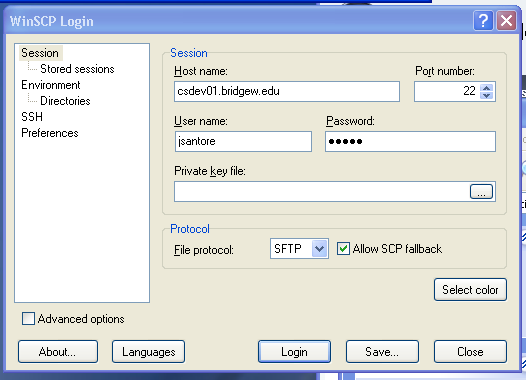
Once you install winscp, you can either choose an exploror like interface and drag and drop between the winscp remote window and your local windows explorer windows, or you can use the commander like interface (shown in the images below) which will keep both the local and remote folder views in the same split window.
Login normally, there is no need to change anything except the host name, your csdev01 username (which will not be as nice as mine unfortunately) and your password.
Finally you will see something like this if you are using the commander-like interface: