CS570 Project 2
Modified "BotBall Game"
New: more information on the board layout.
Overview:
This is a modification of the "botball" competition played by high school students in tourniments organized by the Kiss Institute for Practical Robotics. You can also view the website for the competition itself if you like. The high school students work on their project for months and have both a handboard and an RCX brick to work with. You have just under two weeks and only lego robots but are computer science graduate students so it almost evens out.Materials:
Once again you have a bin of Legos waiting for you in the lab. This time you are using the RCX lego brick so the specialized materials are a bit different. You will have- The sort of lego technic materials as last time (two bins have been switched: groups 2 and 3 are switched, groups 1 and 4 are still working with the same kit)
- One RCX brick
- One lego serial IR tower
- Batteries
- 6 rechargeable AA batteries
- 1 recharable 9V battery for the IR tower.
- Motors: 2 lego motors
- Sensors
- two lego light sensors.
- two lego touch sensors
- one lego rotation sensor.
Lab Availability:
After April 7th, the lab is available at any time that the Moakley open access lab is open. Until that date we are sharing the lab with the night class that meets on Tuesday and Thursdays, please make sure that the lab is cleaned up for them.Your task:
You will build a robot to compete in the cs570 ball competition outlined below. You must follow all of the rules below.The Rules:
The playing surface:
Your playing surface is made up of a 4x8 pen made of 1x3 wooden strapping. Two corners of this playing field are nailed together. To facilitate transport, the other two are held in place with cornder clamps as shown in the photo below.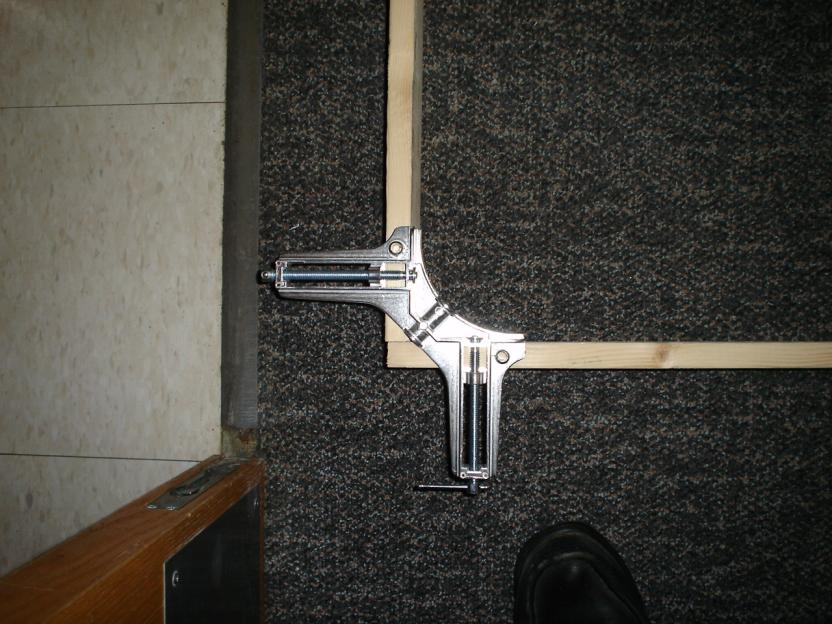
Each robot will start at one end of the playing field inside of that sides start box. Robots that do not fit in the start box will be disqualified. There are two pieces of wood protruding from the sides of the outside bountries of the playing field at 45 degree angles. The diagram below shows the layout of the playing field. The wine colored lines represent the wood strapping. The dotted black lines indicate black tape on the white background. The game will be played on this surface. There are also several small magic marker marks indicating the position of upright tubes containing balls.

Setting up the board.
The board is to be setup as shown in the picture below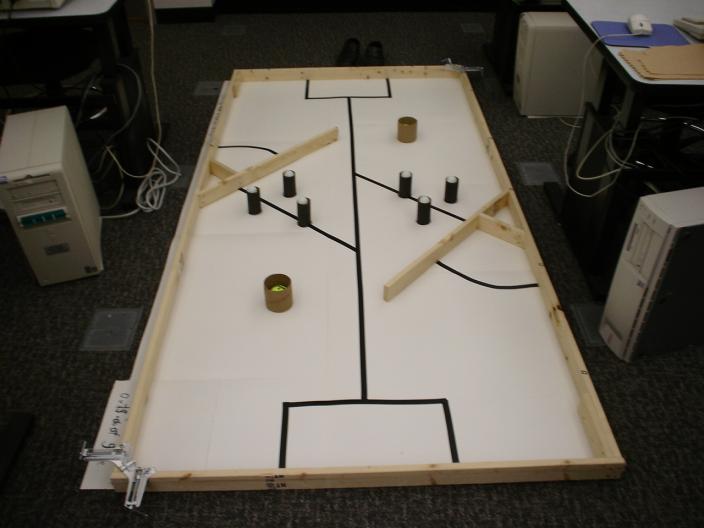
The black cardboard tubes are to be setup inside the six small black circles that have been drawn with magic markers. Each tube should be filled with three ping-pong balls. Two larger cardboard tubes should be placed around the large black "X" marks on the board. There should be one tennis ball in each of these tubes as you begin.
To setup the board, first get the large white sheet of posterboard with the black tape on the game surface side and lay it black tape side up on the floor. Next get the two wooden pieces from next to the robot cabinet. One of them has black 'o's all around the top of its strapping. Place the wood so that the black 'o's are face up and along the outside edge of the straight side of the game board and along the approriate end of the game board. Next place the second piece of wood so that it completes the rectangle and use the two corner clamps to fix the board in place. Once the board is constructed, get the balls and tubes from the box marked "John Santore" on the back counter and place them around.
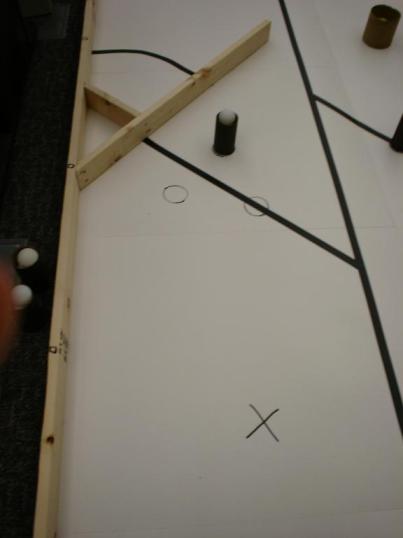
Here is a picture of the marks that indicate where to put the larger tubes (the 'X') and the smaller tubes (the circles)
Please make sure that you put the game board away when you are done for the night. I plan to setup the board more perminantly at the front of the lab where the grads sit once the class is done on Thursday night, but for now we need to co-exist with the other class.
Playing and Scoring in the game:
Your robot will start in the starting box (as shown by tape on the background of the field) that it is assigned. You can start it in any orientation that you like. You will turn your robot on and when prompted to by your instructor, you must push a single button to start your robot. At the point you cannot touch your robot again till the end of the contest. The contest round will last 2 minutes (120 seconds maximum). At the end of those two minutes your robot must be powered down and still. During those two minutes your robot is free to try to maximize the points it earns. This is not "robowars", your goal is not to decimate the competition, but you need not avoid contact either so long as your robot appears to be intent on trying to earn points from the contest rather than just running into robots for the fun of it.points:
Contesting robots earn points as follows:- For every ping-pong ball in your start zone at the end of the round: 3 pts
- For every tennis ball in your start zone at the end of the round: -15 pts (yes that is negative points for tennis balls in your start zone.
- If your robot leaves the playing field (defined as at least half of the robot or the RCX brick (which ever is more outside) being outside the outer stapping bountry: -30
- If your team starts in start box A, then for every tennis ball in
the other position labled 'A' in the layout diagram above: 30pts (note
that the board is symetric so that there is a chance for both teames
this way.
- For every black cardboard tube in your start zone at the end of the 2 minutes: 1 point.
- If your robot is in your opponant's start zone at the end of the 2 minutes: +5 pts.
- toucing your robot after the start of the contest but before the end: -200 pts
- If your robot continues moving after the 120 second time is up:
-5pts/second beyond 120 that the robot moves.
Try it solo first.
I was going to make this a more group project, but try the competition
solo first and we will see on Thursday if there is a need to put you
into two teams.Navigation and other things to keep in mind
We've just spent some time discussing navigation in a well known world. The playing surface is well known and predictable, it will start out the same everytime the game is reset. How will your group navigate this well known world?Have fun:
This should be a fun lab - and an excellent way to move from the theoretical to the practical.A Note on the Batteries:
The Lego robots run on 6 AA batteries. The school has
purchased high capacity rechargeable batteries
for use in this class. Make sure not to lose them. Six of these
batteries and one rechargeable 9-volt
battery has been placed in each kit. The 9-volt battery is needed by
the IR transmitter. Please take the batteries out of the robot if
your group is not going to be using the robot for more than about 36
hours. (if you leave Saturday afternoon and plan to return Monday
morning then fine, you can leave them in, but if you are leaving for
the weekend take the batteries out. Remember that you are
responsible for replacing any parts that your team might
damage.)
When your batteries run out of charge, you will need
to recharge them. The 9-volt batteries take about 30 minutes to
charge and use the 9-volt charger on the file cabinet in the lab. It
used the adapter labeled "AC/DC
adapter." Plug the adapter into the outlet, then plug the
adapter into the charger. This charger can handle any number of
batteries at once from 1 to its maximum capacity. The indicator
light will turn green when the battery is charged. Return the charger
to the top of the cabinet when done.
When charging the AA
batteries, use the two Energizer rapid chargers on top of the cabinet
(along with the two adapters labeled "Energizer.")
Batteries must be charged in groups of two in these chargers. The
batteries take about 15 minutes to charge.